Saturday, January 30, 2010

If it's not broke... DON'T FIX IT!

This is going to be a little rant.

The boys got 2 sets of Lincoln Logs for Christmas. I got a large comerative all wood set and my parents got them a smaller set with plastic roofs. Lincoln Logs are a timeless classic right? I grew up with them, my Dad grew up with them and my daughter had a set when she was the age the boys are now.

So I just dumped all the sets together and didn't think much of it. Till today.

I was building with Robert and the logs just weren't fitting right. Upon closer inspection they are NOT THE SAME SIZE!!!! The notches are not spaced the same, the roof was completely different and COMPLETELY incompatible! And the diameter of the logs isn't even the same.

Now the beauty of classic toys is they ae classic! you can put 10 year old lego's on todays Lego's and you should be able to build with 10 year old Lincoln Logs along with new ones. So I had to sort out the LL's which, sadly, greatly reduced the size of their set.

Just thought i would also share a couple photos of the differences.

Old logs on the left. New logs on the right.

New log on the left and old log on the right. These are the foundation 1/2 logs and you can clearly see they are not the same size!

Friday, January 29, 2010

steam blocking acrylic

1st, here is an excellent blog post about blocking acrylic.

You can block acrylic

And here is my post.

I figured I would do a more detailed post on blocking the acrylic scarves I have been making. I did another Branching Out using Caron Simply Soft in the Autumn Red color. I really like Caron SS for these as it's a lighter weight and so soft and has good drape. Fancier lace yarns and wool are also great for lacy items but you are not limited to them. They can be quite pricey and higher maintenance. And if I am to gift something to someone i want it to be easy for them to care for. I was speaking with my cousin and she agreed that if she were to receive something that took extra care she would be afraid to use it and I don't want PPL to be afraid to wear my stuff! Now I do in tend to do some fancy fiber lace but this works great till then. And let's face it, if you are on a budget acrylics are very appealing!

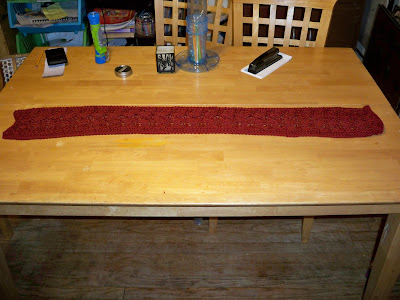
So here is the scarf on my dining room table straight off the needles. I did tie in my ends but that is it. It's rather scrunched up as these type of things tend to be.
Here's a closer view of the stitch pattern. Hard to see right?

Ahh, and my new toy! It works great! Conair fabric steamer There is not a brush on the head (fine for my uses) and there is not an off switch to keep the steam from flowing freely when not in use but other than that it's great!

I am using a little portable ironing board that I keep stashed next to a shelf. It has a pull out rack on the back which supports the steamer head. I don't iron (avoid it as much as possible) so this is the board I use.

As you work, you will want to stretch the fabric out with your hands. Steam and shape, steam and shape. Do not try to hold it while you are steaming or you may likely get burned!

And here I'm steaming away! Doing small segments at a time so it's easier to handle. don't move on till you are completely satisfied with the shaping of the area you are working on. Notice i'm not using pins? Don't really need them as the stam relaxes the fibers and it's easy to shape them by hand. I'm not actually touching the fiber with the steamer, I'm hovering just above it so as not to squash the yarn.

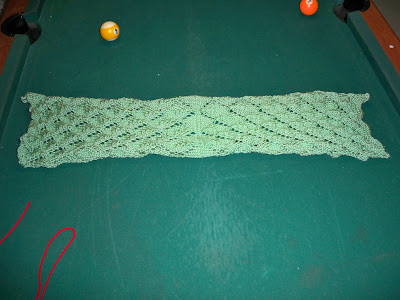
Here is a good view of a section that has been steamed against the next which has not.


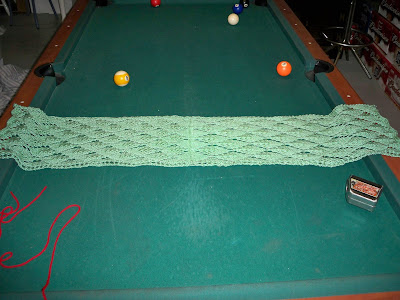
And the finished scarf laying on the same table for sizing refrence. It gew quite a bit!

Closeer view of the stitches.
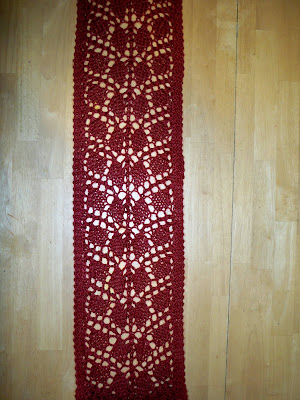
And as you see the steaming has not affected the drape in any way, infarct I think it made the drape better!

You can do this with a good steam iron as well. just make sure not to touch the iron to the fabric or it will melt it (acrylic is plastic after all).

Happy crafting and don't let your budget get in the way of creating beautiful things!

Monday, January 25, 2010

Cabeling without a cable needle

I thought I would post how I cable w/o a cable needle. 1st, I should remind you I am left handed and knit as such (from left to right) so this may seem backwards if you are a right handed knitter. This method works best when knitting in the round. For this swatch, because I turned the work, I had to slip the cable stitches knit wise to reposition them and then put them back on my right needle. When knitting in the round the stitches are already in the right position for this method so this step is not necessary.

I began to figure out I knit differently while making this post. this was the post that opened my eyes to the fact that I am a combination knitter. This tutorial is done form the stitch orientation of the leading leg being in back so I am knitting through the back loop, but it doesn't twist my stitches.

This is a 6 stitch wide cable and equals a cable stitch wehre it directs you to hold the stitches to the front. For me these cables twist to the right due to the direction I knit.

Here I have my stitches in the right position and am ready to start the cable.


Here I have skipped the 1st 3 stitches, leaving them on the needle and knit into the 4th stitch back.

Leaving the 3 skiped stitches on the needle along with the one I just knit I knit into the next stitch.


Here I have knit my 3rd stitch. You see the 1st 3 skiped stitches on the needle still and the next 3 stitches are actually still on BOTH needles.
Now I pinch the 1st 3skiped stitches and pull out my right needle leaving the 3 stitches i just knit on my left needle.


holding my left needle to the back I put my right needle back into the life stitches I was pinching this is where the cable crosses.

Now I bring my needles back to the normal positions and knit into the stitches that were originally skipped and continue on as normal.

Friday, January 22, 2010

new scarf, new toy

I just got my Conair steamer from Amazon $30 free shipping. I have been working on the Branching Out scarf pattern. If you are left handed you may find it usefull to swap the k2tog for ssk and such to have the proper leaning of the stitches. I am new and it is just easier for me to read the chart as is rather than try to remember which new stitch I should be using instead of what the chart reads. Also I use sssk instead of the sl-k2tog-psso for the mirror to k3tog. sssk is the exact opposite and gives it a smoother look. For those who don't know, as a left handed knitter (knit from the right needle onto the left) our stitches lean the opposite direction as the same stitches done right handed.

I think I"m going to love the steamer! it has alot of power and pumps out really hot steam. it was like magic watching the fabric relax and the design emerge. For acrylics you gotta use steam to reset the fabric so to say. wet blocking doesn't do much for acrylics as it's basically plastic.


Sunday, January 17, 2010

Cherry leaf scarf

So I finished my 1st lacy knit project. Cherry Leaf Scarf is a free pattern. I used Carron Simply Soft Eco and I steam blocked it ( as it's an acrylic). This was also the 1st time I grafted 2 pieces together And the 1st time I blocked knitting. I guess you can chalk it up to progress! Anyway, the pattern was fast and easy. I made a few mistakes on the1st half but plugged away and used it for a swatch so I could try some things and iron out some kinks and see how it looked doing it different ways. Then I started on the "real" thing when I felt good enough to do so.


my grafting, pretty good for a 1st try IMO.


Thursday, January 7, 2010

Yarn babies

If your SO ever wonders why your stash keeps growing....

Yarn get's lonely and an unattended stash of yarn set quietly in a corner or tub will reproduce. Acrylics don't always produce acrylics, and natural fibers don't always produce natural fibers. If acrylics and natural fibers are stored together and left alone some strange and fun yarn babies may soon pop up.

Now some yarn babies are rather simple and plain. Others may require more attention and be higher maintenance then their parents. Some may not like your trusty hook or needle and my cry for some new tools. It may help to try different things to find what they want and nurture them. Also some yarn babies may not want to be like their parents. They may require some new patterns you never thought of making. You may need to learn some new stitches to help build their character.

Stash growth is not limited to the creation of yarn babies. Some times old family members will return home when they hear there are new arrivals and you may find a reunion on your hands. This may come in the form of some vintage yarns.

Stashes also tend to migrate towards each other. You may find odds and ends making their way into your stash from the strangest places and different corners of the globe. Diversity is good, it breeds a healthy yarn environment. And don't be ashamed of those crazy family members that pop up in the form of novelty yarn. They may seem to wild and crazy, but fun fur and ribbon yarn deserve love to.

Be aware that your stash may also draw you to other stash owners. This should provide endless opportunities for yarn bonding amongst fiber and friend.

So love your yarn, and your yarn will love you back!

Saturday, January 2, 2010

fingerless mittens/gloves

12-6-10 update
After finishing the mitts I have realized that a slight change in the pattern would bennifit the end result. The main pattern on the mitts seem to be pulled twards the thumb. I believe to solve this I intend to do 2 knit stitches on either side of the cable and leave 2 knit stitches between the main pattern and the thumb. this should even it out. they are pretty either way though.


So I finished another knit hat with the brim and it inspired me to make some fingerless gloves.

Now I should make the disclaimer 1st before i go on with this...

I have never knitted a glove or mitten for that matter. I am still shaky on knit pattern reading and don't even think I could pretend to write one!

I did not have a pattern. I used the same yarn I used for my last hat which was 100% merino superwash.

so I cat on 36 stitches using size 5 needles and devided them evenly. I did about 1 inch of 2x2 ribbing and started in on the pattern.

Half of the stitches are all stockinette for the bottom so that leaves just the back of the hand for the pattern.

the "pattern" for the strips are 3 stitches in seed stitch, k1, p1, 6 stitch cable (6 rows betwen twists), p1, k1, 3 stitches seed stitch.

for the thumb gusset i made one pearl stitch (m1p) and left one row of the stockinette stitch to seperate the thumb seed stitching and the back of the hand seed stitching.

Every other round I did either m1 or m1p depending on what the seed pattern called for. I did this on both sides of the gusset area. one row of plain seed stitch, one row of increases untill the thumb hole was large enough. When it was large enough I bound off all the thumb stitches and went back to the original stitch pattern making sure I had 36 stitches on the needles when the thumb was done. I continued with the pattern in the round till it was long enough and finished with a 2x2 ribbing at the bottom.