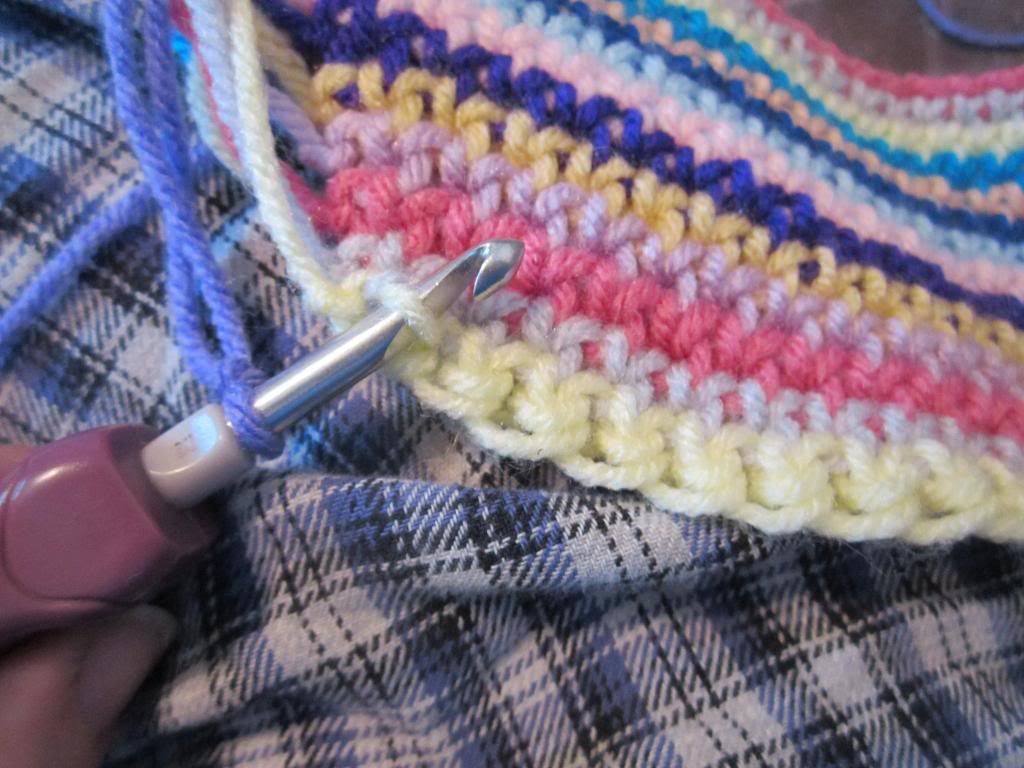
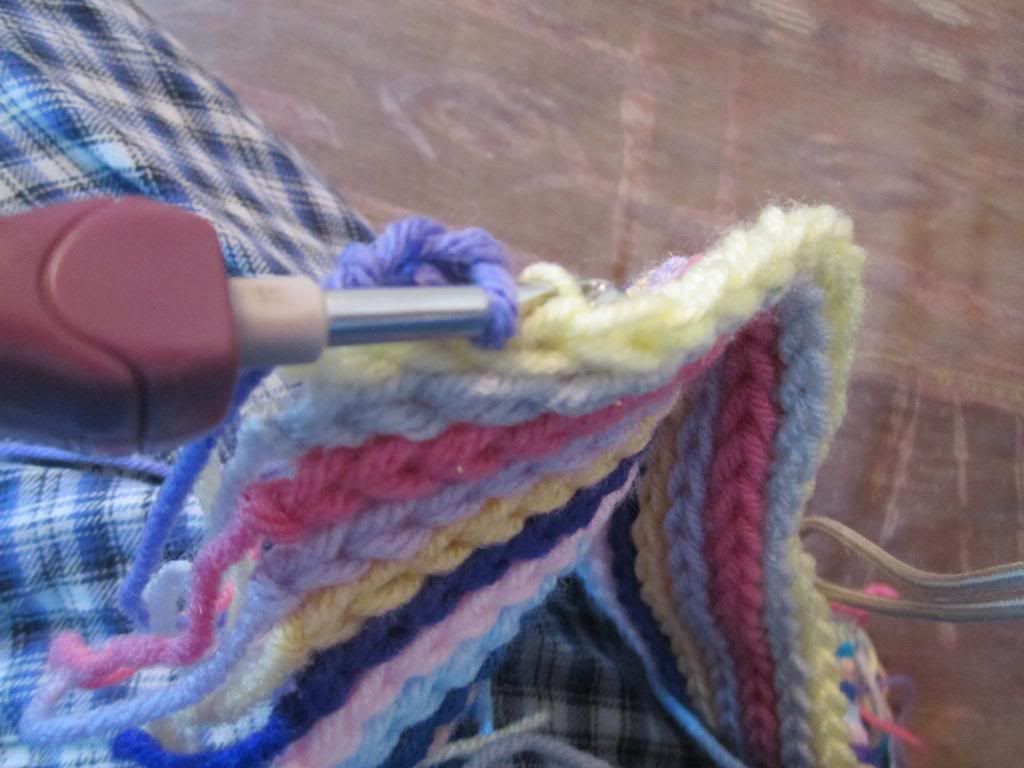
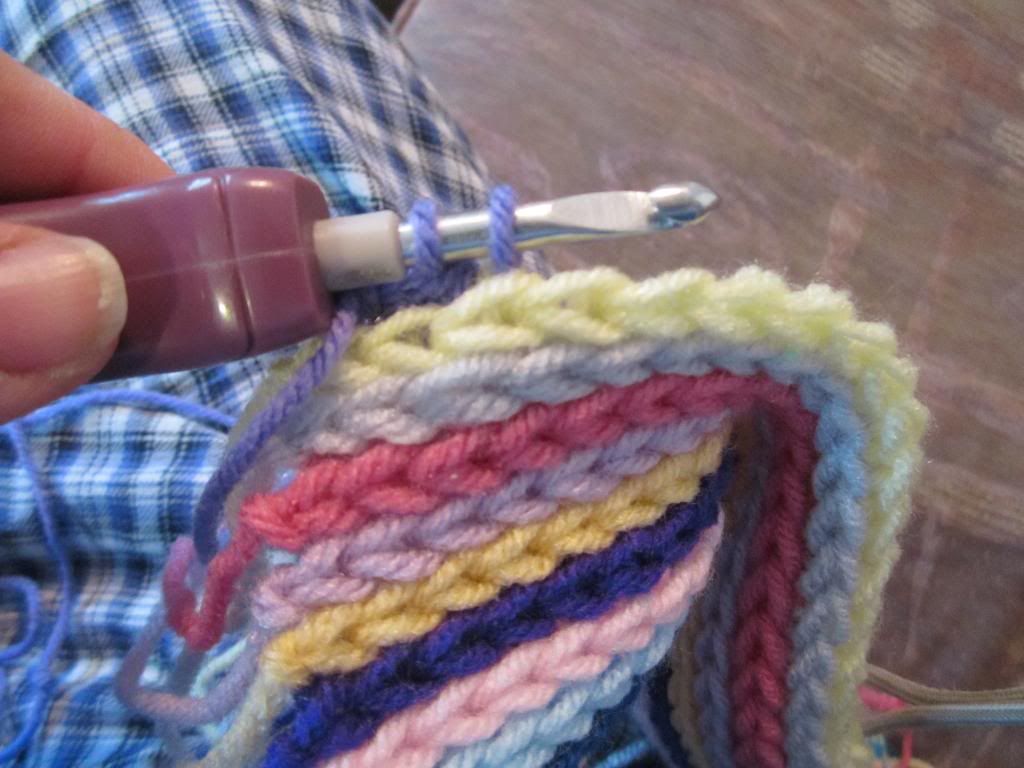
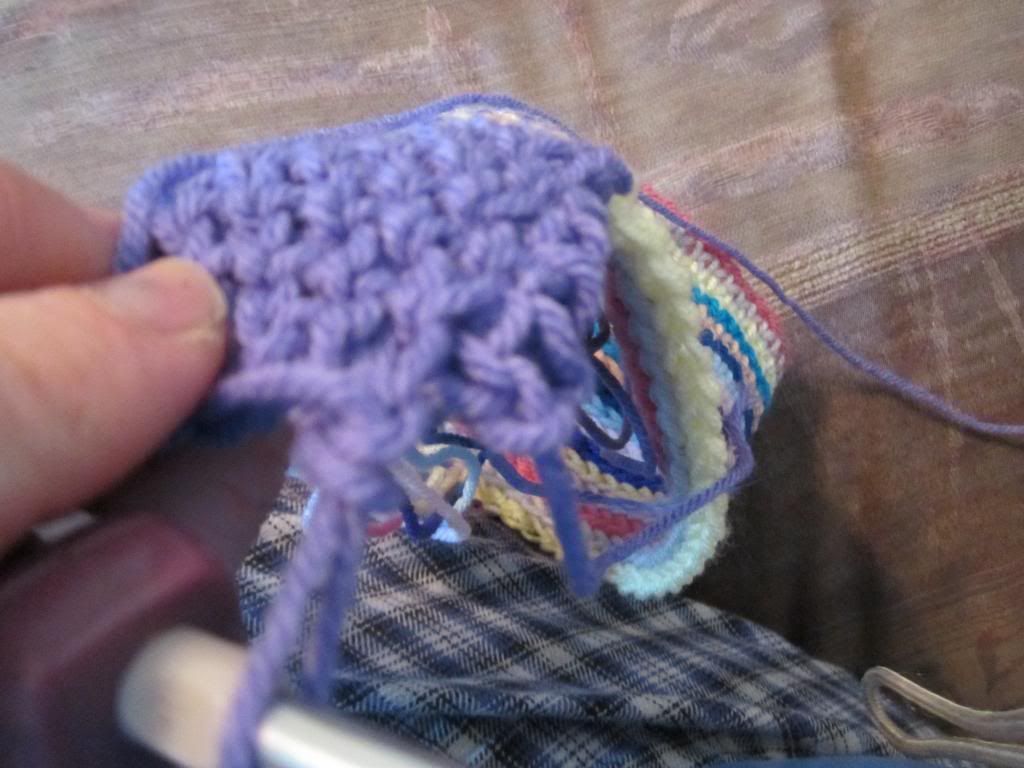
I mostly chart my stuff in Excel. I like it, it's easy and you can do some neat things with it. I'm making a shrug based on a stitch pattern in an old book. The pattern was written so I had to chart it. It's a busy pattern so charting it wasn't the easiest to transfer from flat written to charted in the round.
This is a section of the chart i printed for decreasing. Te center is the pattern repeat and the sides are the repeat sections I will be decreasing. I have shaded lines across the chart on the decrease rows and I changed the font for the sections I will decrease to a really light font. I printed this out and it allows me to see what the pattern repeats are supposed to do and I can adjust and over wright with a pen the changes I made as I decrease. I use a pencil and shade in "no stitch" areas as I get rid of sections and can easily decided when it's to narrow to continue in pattern. When I am done I will go back in and make the changes to the chart to reflect what it really needs to be.
The dark row at the bottom is an unaltered pattern repeat for reference to build off of.
Here is what it looks like in progress with notes over written. I take this back to the computer and update the chart.
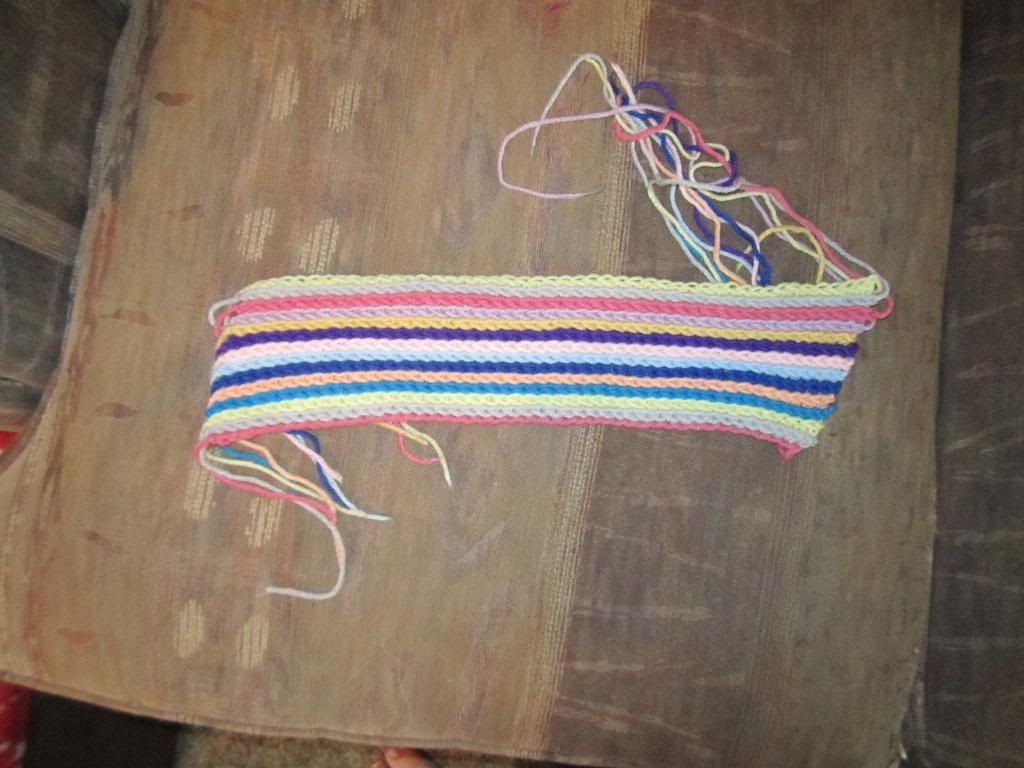
And this is what I'm working on
A place where I can share patterns and help others on their way to loving fiber crafts while being left handed.
Sunday, December 21, 2014
Saturday, November 1, 2014
Carving Starry Night
So this Halloween i decided to tackle Van Gogh's Starry Night. To do this I have some wood carving tools I picked up at Michael's craft store. Clay tools really aren't sharp enough. i also have a couple small loops for carving out.
I printed off the picture. To conserve ink I just printed it under the "draft" setting. Didn't need a really nice print, just to get the idea. I used a regular ball tip pen to transfer it to the pumpkin. I did this freehand. You can make a couple pricks through the print to get a few points for size reference.
To start carving i clipped my print to a board so I could have it to look at as I went. After gutting the pumpkin and thinning the walls I got one of the tap lights that are battery powered and put it inside. I put the light in a sandwich bag 1st so it didn't get pumpkin on it. I liked the light so much that we ended up using it instead of candles when we were done.
To get the walls a uniform thickness i have a needle probe in my set and poked it through teh wall in several spots to cofirm that it was all the same thickness. I scraped it to about 1/2 - 3/4 inch thickness.
I used a small curved blade for most of the pumpkin. To get the crisp outlines I partially cut into the skin following the lines I made than used a flat chisel blade and cut towards the outline cuts and chipped out small bits to create the outlines.
Slowly carve in layers! You can't un-carve. I worked away at he moon with large and small curved blades. I used a hole punch for the stars (you can see the tools in the background... and the pumpkin all over me!)
Pumpkins like this are in revese. The deeper you go the brighter the spots get. I used the edge of the angled chisel to scrape the deepest lines by the mountain and moon. the Moon is nearly cut through on the outer edge and I did cut through around the points and circle
For the buildings I poked in straight with a flat chisel than cut towards my 1st cut to chip out the flesh.
This angle shows the moon well.
When I'm done I wash the pumpkin inside and out to get any hanging bits. this really does make a huge difference in how clean the lines of a pumpkin look! i than went and checked for any areas that needed touch ups.
This was only the 2nd time I have done a shadow pumpkin. I really am happy with this. I think I could have had more depth around the stars, but this is pretty good!
Thse are pumpkins that my kids did.My daughter Anja's pumpkin
My youngest son, Michael's pumpkin. he will be 9 in January and he cut this by himself!
You can see the tap light in this one. They really do work great!
And my older son, Robert's pumpkin.
Friday, April 11, 2014
Weaving in ends - knitting
I just came across this amazing post with excellent photos detailing many ways to weave in ends in your knitting and thought I would pass it on.
http://www.purlbee.com/knitting-tutorials-finishing/2011/7/14/weaving-in-your-ends.html
Tuesday, January 21, 2014
Lasagna
Posting my lasagna recipe.
1. because it's good
2. I thought i lost it when I lost my cooking program files but found a paper copy and don't want to loose it for real.
I actually double this when I make it
1 lb ground beef (I use Bob Evans Italian roll sausage)
1 can tomato sauce
2 jars spaghetti sauce
I used my own sauce so don't add these ingredients, will post sauce recipe
chopped onion to taste
chopped bell pepper to taste
2 tbsp chopped parsley (to taste)
1 tbsp chopped oregano (to taste)
minced garlic (to taste
1 cup small curd cottage cheese
1 container ricotta cheese
1 egg
mozzarella cheese - shredded to taste
1/2 cup grated Parmesan
combine parsley, ricotta, cottage cheese, oregano and egg
preheat oven to 350ºF
I do not fully cook the pasta, I just boil it till it's a little bit soft but still
In pan coat bottom with sauce
layer with pasta, ricotta mix than mozzarella (save some mozzarella for end)
repeat layers ending with sauce.
cover and bake about 35 minutes
uncover and top with remainder of the mozzarella and Parmesan and return to oven uncovered for another 10 minutes.
For my spaghetti sauce I brown 1 lb roll Bob Evans Italian sausage I add the onions and bell pepper with the sausage. I combine that all into a pot with 1 28oz can tomato sauce and 1 14.5 oz can Italian style diced tomatoes. Add in what ever you like to sauce (mushrooms and such). I also add about 1 tbs honey (or brown sugar).
simmer down to desired consistency.
1. because it's good
2. I thought i lost it when I lost my cooking program files but found a paper copy and don't want to loose it for real.
I actually double this when I make it
1 lb ground beef (I use Bob Evans Italian roll sausage)
1 can tomato sauce
2 jars spaghetti sauce
I used my own sauce so don't add these ingredients, will post sauce recipe
chopped onion to taste
chopped bell pepper to taste
2 tbsp chopped parsley (to taste)
1 tbsp chopped oregano (to taste)
minced garlic (to taste
1 cup small curd cottage cheese
1 container ricotta cheese
1 egg
mozzarella cheese - shredded to taste
1/2 cup grated Parmesan
combine parsley, ricotta, cottage cheese, oregano and egg
preheat oven to 350ºF
I do not fully cook the pasta, I just boil it till it's a little bit soft but still
In pan coat bottom with sauce
layer with pasta, ricotta mix than mozzarella (save some mozzarella for end)
repeat layers ending with sauce.
cover and bake about 35 minutes
uncover and top with remainder of the mozzarella and Parmesan and return to oven uncovered for another 10 minutes.
For my spaghetti sauce I brown 1 lb roll Bob Evans Italian sausage I add the onions and bell pepper with the sausage. I combine that all into a pot with 1 28oz can tomato sauce and 1 14.5 oz can Italian style diced tomatoes. Add in what ever you like to sauce (mushrooms and such). I also add about 1 tbs honey (or brown sugar).
simmer down to desired consistency.
Tuesday, January 7, 2014
Tunisian lattice throw
This throw is tunisian crochet on the bias and has a simple but elegant texture. For mine I used Caron Simply Soft in Heather Grey and it took about 5.25 skeins. This pattern is written and will allow you to make this as wide or long as you like. If you want to switch up the edging or add open spaces to it, it is easy to modify.
The pattern is written
Tools:
Tools 6mm / J extended tunisian/afghan hook (or long straight hook). 6 skeins 1500 yards / 852 grams Caron Simply Soft Heather Grey
I have 3 downloads for this pattern.
Tunisian Lattice Throw- mirror. This pattern includes photo instructions on how to create the tunisian stitches and they are left handed.
Tunisian Lattice Throw - standard - This is the same print but I have went and flipped all the images so they appear right handed.
Tunisian Lattice Throw - Chart (left hand) - This is a chart for this pattern. It is a left hand chart ( read left to right) if you are right handed and read patterns right to left you will want to either go into your advanced printers settings and print this as a mirror image so that you will be able to read it right to left. Or just read the printed chart left to right. This chart does not have detailed stitch directions so use it along with the instructions on the written patterns.
The 1st pages are just bare bones with 2 images. I than follow with photos on separate pages to show how to do the various tunisian stitches required for this pattern. This will allow you to just print the pattern or print the photos and tutorials.
I think this blanket works best with a medium shade yarn. Nothing to bright or dark or the texture will be harder to see. Also I chose a solid grey but Tunisian tends to play well with variegated yarn.
This would make a lovely large blanket, just be cautious to make sure you purchase enough yarn as this does consume a LOT of yarn!
I don't know why these pictures are showing up sideways,
Saturday, December 21, 2013
2013 Cookie party!
This is a stock photo of what the cookie cutters can make. The set is no longer made but you can purchase it on E-bay. It is The Williams-Sonoma Holliday Storybook Cookie Cutters set. For reference, the trees are actually about 4-5" tall
This is my post for my 2013 cookie party! I have started a tradition for family and friends that every year I throw a cookie party. This year will be 3D Christmas scene involving sleigh, reindeer, trees and snowman. I will add to this post as the event evolves. I am making the sleigh and reindeer out of gingerbread cookies and the trees and snowman out of sugar cookie dough. I will pre-color the tree dough green.
This is the gingerbread recipe that I am using. It is included in the cookie set.
This is my post for my 2013 cookie party! I have started a tradition for family and friends that every year I throw a cookie party. This year will be 3D Christmas scene involving sleigh, reindeer, trees and snowman. I will add to this post as the event evolves. I am making the sleigh and reindeer out of gingerbread cookies and the trees and snowman out of sugar cookie dough. I will pre-color the tree dough green.
This is the gingerbread recipe that I am using. It is included in the cookie set.
Gingerbread cookies
(This recipe states it's lighter than those used for houses so suitable for small cookies. See my cookie party 2012 post for a gingerbread house recipe.
Have ingredients at room temperature before starting
Combine and sift together than
set aside
5 c. flour
½ t. Baking soda
1T. Ground ginger
4t. Ground cinnamon
¾ t. ground cloves
1t. Nutmeg
1t. Allspice
1 ½ t. salt
½ t. Baking soda
1T. Ground ginger
4t. Ground cinnamon
¾ t. ground cloves
1t. Nutmeg
1t. Allspice
1 ½ t. salt
In the bowl of an electric mixer,
using flat beater, beat on medium-high speed until fluffy and pale yellow (4-6
minutes)
2 sticks (1 cup) butter
Add and beat for 1 minute
½ c. firmly packed brown sugar
½ c. granulated sugar
Reduce speed to low and beat in, until
well combined (about 1 minute)
1 c. molasses
Add and beat until well combined
1 egg
Add the flour mixture in 4
portions, beating in each addition before adding more. Stop and scrape down
sides of bowl occasionally.
Turn dough out onto floured
surface and with floured hands divide into 4 sections. Shape each section into
a disc and wrap in plastic wrap, parchment paper or other material and
refrigerate at least 2 hours or up to 2 days.
Preheat oven t o400ºF (200ºC)
Remove dough 1 disc at a time and
let stand 10 minutes. Roll out to ¼ “- 3/8” thickness and cut.
Bake cookies until lightly
browned on the bottom (4-5 minutes for smaller cookies 6-7 minutes for larger
cookies).
Let cookies cool on the sheet for
5 minutes before removing and placing on cooling rack. Trim cookies while warm
as needed
12-22-13
Cookie party was a success (as it usually is). I found some silicone molds for $1.99 at our grocery store (Meijer's) so I melted Jolly rancher candies into them. the gingerbread men and snowflakes took 1 candy. and I used 3 for the presents to fill the bow space.
For the candy decorations we had...
12-22-13
Cookie party was a success (as it usually is). I found some silicone molds for $1.99 at our grocery store (Meijer's) so I melted Jolly rancher candies into them. the gingerbread men and snowflakes took 1 candy. and I used 3 for the presents to fill the bow space.
And as for the cookies.... it was FUN! We had lots of candy to decorate with and a room full of creative people who have unique senses of humor is always a good thing.
This one belonged to a friend of mine. Her and her husband love to do cookie stuff.
This is my niece with her decked out tree
Another friend has their sleigh running over some poor gummy bears!
And my daughter made a full on cookie crime scene!
For the candy decorations we had...
- colored sugar
- candy corn
- mints
- gummy bears
- gummy worms
- sour gummy worms
- chocolate covered raises
- spice drops
- pull and peel twizlers
- peppermint candies
- mini M&M's
- mini reses cups
- smarties
- candy pearls (in assorted colors and sizes)
- jelly beans
- icing
- buttercream frosting
- royal frosting
Monday, October 28, 2013
My daughter is going on a learning trip to Europe!
My Daughter Anja is now officially accepted into the People to People Student Ambassador program. We have created a FB page that she will update with her experiences through this whole process at.
Trip of a Lifetime
We would appreciate it if you would like the FB page to help get it seen.
Also the actual fundraiser site is.
Help me experience a trip of a lifetime!
She has set the goal at $3000 but the total trip is close to $7000. She will be doing work and other activities to raise funds along with any donations we are able to collect.
This is a 19 day long trip and is full of experienes that she just would not be able to get any other way. IF you would like to see the itinary for her trip you can see it here
Celtic Cultures
Trip of a Lifetime
We would appreciate it if you would like the FB page to help get it seen.
Also the actual fundraiser site is.
Help me experience a trip of a lifetime!
She has set the goal at $3000 but the total trip is close to $7000. She will be doing work and other activities to raise funds along with any donations we are able to collect.
This is a 19 day long trip and is full of experienes that she just would not be able to get any other way. IF you would like to see the itinary for her trip you can see it here
Celtic Cultures
Wednesday, September 4, 2013
Knitted decreases... how do they work?
This description is directed at mirror knitters and the mirrored version of decreases.
Mirror knitters swap the meanings for the decreases we use because we approach the stitches from the other direction.
I am posting this here. I have shared this on a board on Ravelry and thought i would add it here for refrence.
Below is a swatch I made showing various decreases with explanations of how/why they work. This description is of the decreases from the top section down.
These descriptions refer to stitches mounted so that the leading leg is in front. Due to your personal style of knitting the stitches on the needles may not be mounted leading leg in front and require extra slipping for correct placement to avoid twisting your finished stitches. I am a combined knitter so I have to manipulate stitches a bit more than some.
Patterns are written assuming you have your leading leg in front so that is what based these descriptions on.
block 1:
on the left are ssk’s - the line of decrease slants to the right (right leaning) the stitches to the right are ending at the line of decrease
on the right are the k2tog - the line of decrease slants to the left (left leaning) the stitches to the left are ending at the line of decrease
at the top where they join is s1 k2tog psso (you can see both lines of decrease end at this point and the point sits on top and the center stitch under sort of disappears into the point.
the last decrease directly on top is a sl2tog k1 psso you can see the center line stays on top and the side stitches end into and behind it.
block 2:
these are all s1 k2tog psso - when stacked this creates a choppy line because the side stitches are being pulled over the center stitch and covering it.
block 3:
sl2tog k1 psso - you can see the center line stays on top and the stitches that are being reduced are “disappearing” behind the center line.
this stitch is not used nearly as much as the s1 k2tog psso decrease.
on the bottom 2 samples I placed an extra row between the 1st and 2nd decreases to sort of show them better. on the top sets of decreases I worked them directly on top of each other
*you can click to enlarge the image for a better view.
Mirror knitters swap the meanings for the decreases we use because we approach the stitches from the other direction.
I am posting this here. I have shared this on a board on Ravelry and thought i would add it here for refrence.
Below is a swatch I made showing various decreases with explanations of how/why they work. This description is of the decreases from the top section down.
These descriptions refer to stitches mounted so that the leading leg is in front. Due to your personal style of knitting the stitches on the needles may not be mounted leading leg in front and require extra slipping for correct placement to avoid twisting your finished stitches. I am a combined knitter so I have to manipulate stitches a bit more than some.
Patterns are written assuming you have your leading leg in front so that is what based these descriptions on.
block 1:
on the left are ssk’s - the line of decrease slants to the right (right leaning) the stitches to the right are ending at the line of decrease
on the right are the k2tog - the line of decrease slants to the left (left leaning) the stitches to the left are ending at the line of decrease
at the top where they join is s1 k2tog psso (you can see both lines of decrease end at this point and the point sits on top and the center stitch under sort of disappears into the point.
the last decrease directly on top is a sl2tog k1 psso you can see the center line stays on top and the side stitches end into and behind it.
block 2:
these are all s1 k2tog psso - when stacked this creates a choppy line because the side stitches are being pulled over the center stitch and covering it.
block 3:
sl2tog k1 psso - you can see the center line stays on top and the stitches that are being reduced are “disappearing” behind the center line.
this stitch is not used nearly as much as the s1 k2tog psso decrease.
on the bottom 2 samples I placed an extra row between the 1st and 2nd decreases to sort of show them better. on the top sets of decreases I worked them directly on top of each other
*you can click to enlarge the image for a better view.
when working decreases on the wrong side that will be seen on the knit side you need to switch decreases to get the desired result on the right side of the fabric.
To demonstrate why this is, take a small piece of paper and make a diagonal line from the lower left to the upper right corner, this line represents a right leaning decrease. When you turn the paper over that line is now left leaning.
ssp = left leaning decrease on the right side
p2tog = right leaning decrease on the right side
If you are decreasing in a field of purls and the purl side is the right side it doesn’t matter which decrease you use because lean cannot be seen on the purl side. use whichever one is easier for you.
To demonstrate why this is, take a small piece of paper and make a diagonal line from the lower left to the upper right corner, this line represents a right leaning decrease. When you turn the paper over that line is now left leaning.
ssp = left leaning decrease on the right side
p2tog = right leaning decrease on the right side
If you are decreasing in a field of purls and the purl side is the right side it doesn’t matter which decrease you use because lean cannot be seen on the purl side. use whichever one is easier for you.
Monday, July 15, 2013
Fixing an accidental short row
So you are knitting and you find that you have this strange hole. You don't know exactly what it is, but you don't want a hole in your knitting.
You figure it's not to bad, only 1 stitch, so you ladder down to fix it.
When you get down to the hole you find a loop
This loop means you set your knitting down mid row and when you picked it back up you accidentally turned your work creating a short row.
To fix this you actually need to drop 2 columns of stitches. Here I dropped the stitches to the right of the loop. You want to drop the stitches on the other side of the loop. My loop is on my left so I dropped another column on the right. You want to drop just to the stitches directly below the loop.
Here I have placed the 2 stitches onto a crochet hook. Crochet hooks are very handy for this sort of thing.
Holding the loop I am grabbing both legs and will draw them through the 1st loop on the hook to create a stitch. Don't pull all the way through. .
Leave the loop end hanging out. you can stick a stitch marker in it if you are worried about loosing the loop. I used a knitting needle and stuck that through the loop. Here my stitch is on the hook and the loop is on the needle above it.
place the stitch you just made onto a needle or something to keep it and don't loose the loop sticking out.
Now your next stitch you want to drop just 1 more stitch down from where you are
Here my hook is through my stitch and the bar above it that I just dropped
And hook the loop
Pull both the loop and the bar through the stitch on the hook.
Transfer the stitch you just made to your needle. You now have 2 stitches that are 2 strands thick on the needle
Now just work your way back up to the top knitting with the bars from the stitches you just dropped and treating the 2 strand stitches as though they were just one strand thick.
Personally I prefer to work with my needles. I knit my 2 stitches, transfer them back to the other side needle and knit them with the next bar and repeat till I'm back at the top.
Once you worked back up you now have fixed the hole. There is a slight thickness where you fixed it form the 2 stitches that are double thick. Also you have 1 more row on one side than the other from accidentally turning your work. But this won't really be a problem unless you do this to often. This fix disguises the problem area and closes the hole created by the short row.
You figure it's not to bad, only 1 stitch, so you ladder down to fix it.
When you get down to the hole you find a loop
This loop means you set your knitting down mid row and when you picked it back up you accidentally turned your work creating a short row.
To fix this you actually need to drop 2 columns of stitches. Here I dropped the stitches to the right of the loop. You want to drop the stitches on the other side of the loop. My loop is on my left so I dropped another column on the right. You want to drop just to the stitches directly below the loop.
Here I have placed the 2 stitches onto a crochet hook. Crochet hooks are very handy for this sort of thing.
Holding the loop I am grabbing both legs and will draw them through the 1st loop on the hook to create a stitch. Don't pull all the way through. .
Leave the loop end hanging out. you can stick a stitch marker in it if you are worried about loosing the loop. I used a knitting needle and stuck that through the loop. Here my stitch is on the hook and the loop is on the needle above it.
place the stitch you just made onto a needle or something to keep it and don't loose the loop sticking out.
Now your next stitch you want to drop just 1 more stitch down from where you are
Here my hook is through my stitch and the bar above it that I just dropped
And hook the loop
Pull both the loop and the bar through the stitch on the hook.
Transfer the stitch you just made to your needle. You now have 2 stitches that are 2 strands thick on the needle
Now just work your way back up to the top knitting with the bars from the stitches you just dropped and treating the 2 strand stitches as though they were just one strand thick.
Personally I prefer to work with my needles. I knit my 2 stitches, transfer them back to the other side needle and knit them with the next bar and repeat till I'm back at the top.
Once you worked back up you now have fixed the hole. There is a slight thickness where you fixed it form the 2 stitches that are double thick. Also you have 1 more row on one side than the other from accidentally turning your work. But this won't really be a problem unless you do this to often. This fix disguises the problem area and closes the hole created by the short row.
Sunday, May 19, 2013
back bar single crochet
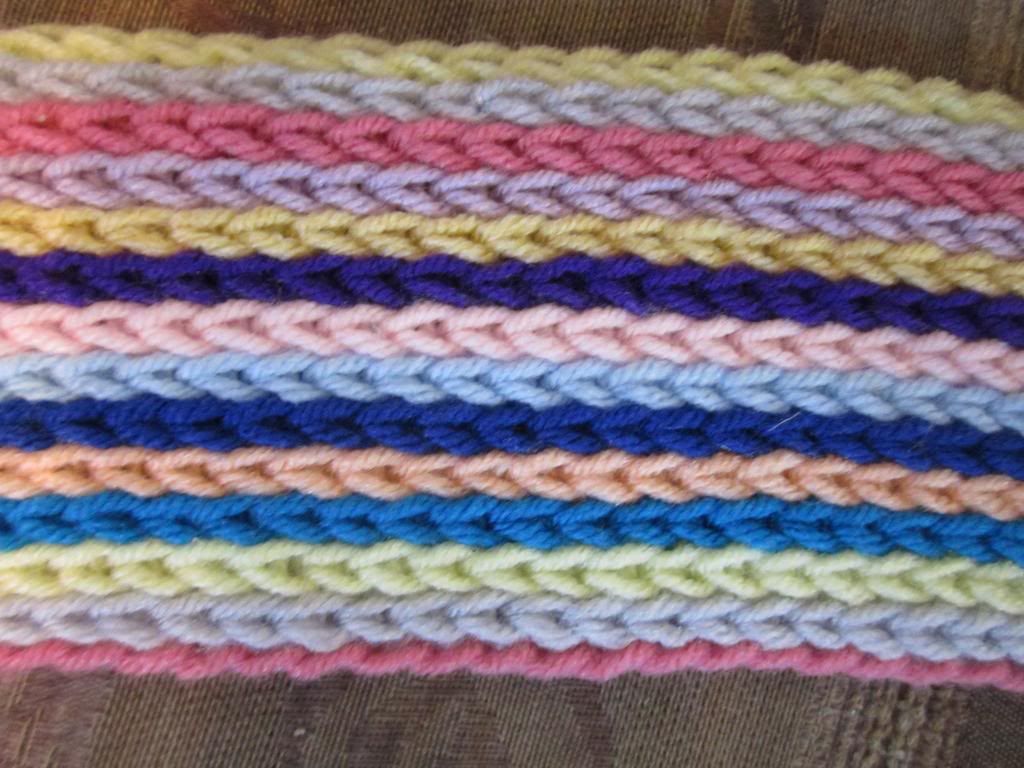
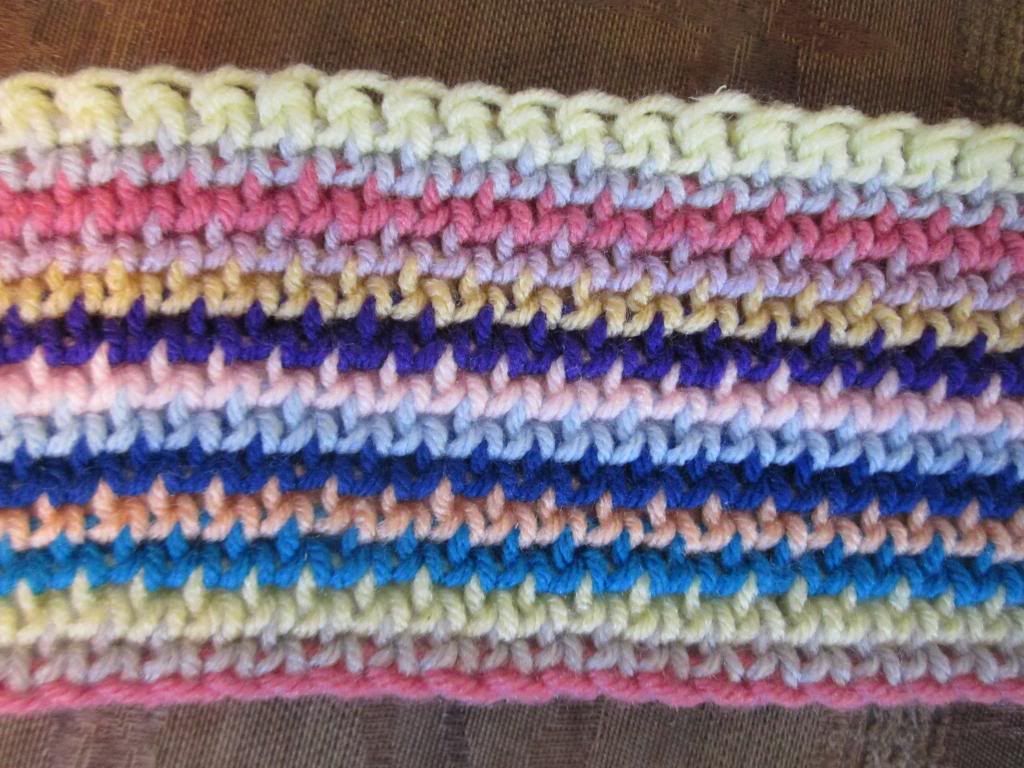
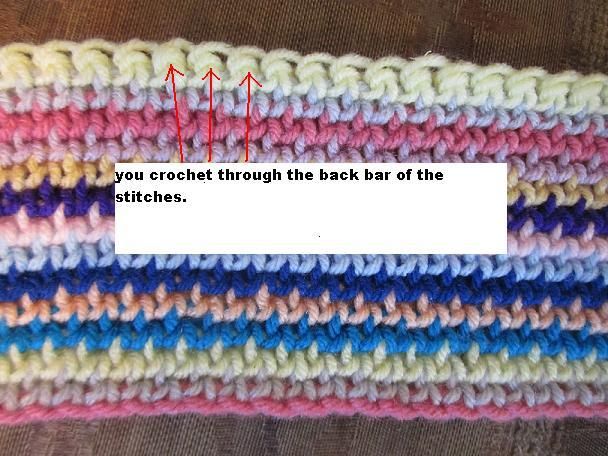
This is a technique that I cam up with when someone posted a "how is this done?" photo. This is crochet through the back bar of the stitch and it is always worked with the right side of the fabric facing you.
When working this flat, you work 1 row and break your yarn and return to the beginning to start the next row new. By working through the back bar of the stitch you are pushing forward the top edge which leaves the right side of the fabric showing the braided edge of each row. This also results in a denser fabric.
I recommend using a larger hook and a non splitty yarn to be sure you can get your hook into the back bar of the stitch. For the initial chain I worked it with a hook 2 sizes larger than the one I did the work with to help eliminating a tight edge.
This also will bias hugely as it's worked all from the right side. There are ways to counter this effect and I will mention them later. Due to the tails on each side, this is also a great fabric to add fringe to, especially if you are working each row in a different color.
This makes a nice fabric for a place mat, or a unique texture for a scarf. You can work it in the round to create a unique striped edging for a blanket.
this is the fabric from the back. You can click on the images to enlarge them.
To start, chain a desired amount for the length you wish to make. Use a hook 2 sizes larger than your working hook to make sure your starting chain does not get to tight while working into the stitches.
* I always prefer to work my 1st row of any project through the back bumps of the chain. This creates a nice edge.
After you have made your chain, turn and switch to the smaller hook and now work 1 row of SC. I like to end with a chain one than break my yarn. (this is the right side of the fabric)
After this point you will always have the right side facing and you will be crocheting into the back bars of the stitches.
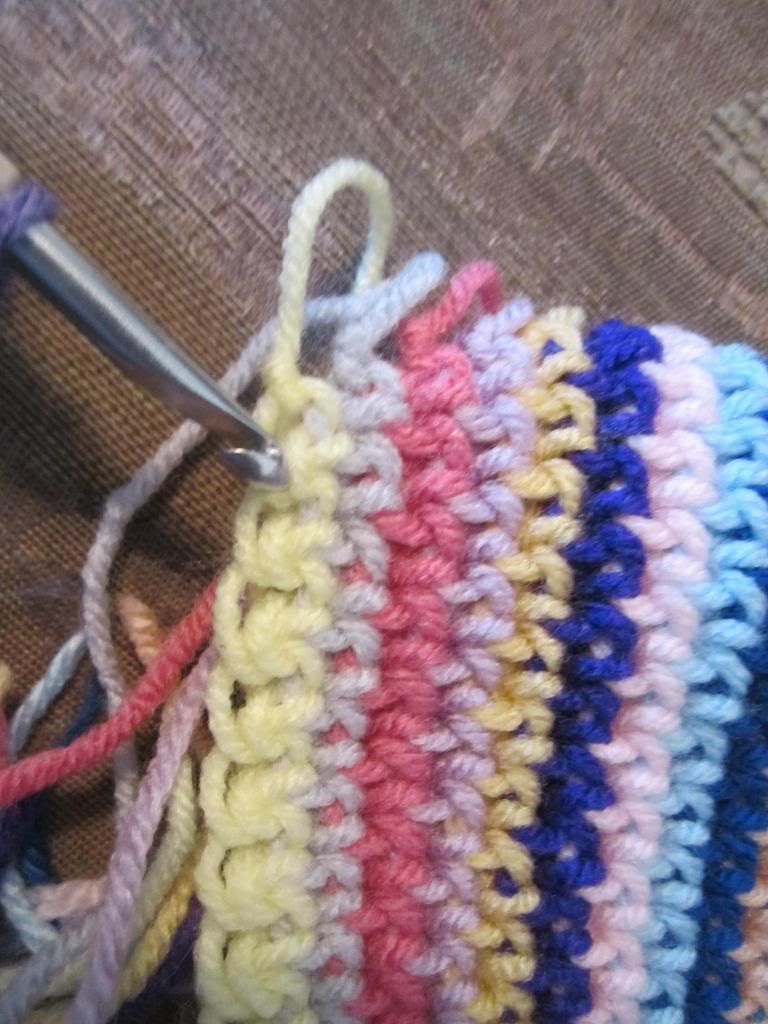
Return to the start and join with a single crochet into the back bar of your 1st stitch.
To join with a single crochet place your slip knot on your hook and insert your hook into the bar, yo and draw up a loop,
yo and draw through loop and slip knot on hook.
Continue working accross the row working 1 sc into the back bar of each stitch on the previous row.
When you reach the end the last stitch can be hard to see. This one is a bit harder to see because i left my ends loose.
Here I have 1 stitch left to make
Continue to work 1 sc in each back bar to the last stitch and chain 1 and break yarn
Working every row as stated above will result in a fabric that slants on both sides. This is just the nature of this stitch.
If you wish to minimize this effect or shape the bottom differently,
you can work 2 sc into the 1st bar of the row and on the last 2 stitches
sc them together (insert hook into next stitch, yo draw up a loop,
insert hook into last stitch yo and draw up a loop, yo and draw through 3
loops on hook). doing this on every row will result in the fabric slanting the opposite way. Alternating every 5 rows or so between regular and the shifted rows will result in a edge that has points.
To make the edges more straight. work one row regular, stitch for stitch to the end. and work the next row with the sc2 in 1st bar and sc2tog in last 2 bars. this will help keep the edges in a straighter line.
On the 1st 3 rows of the pruple here, I have worked them as the shifted rows starting with 2sc in 1st bar. you can see the slant is gong the oposite way as the edg in the fabric below the purple.
the rest of the purple is worked alternating rows which has caused a straighter edge.
this is how the solid section will look from the back
and form the front
Subscribe to:
Posts (Atom)