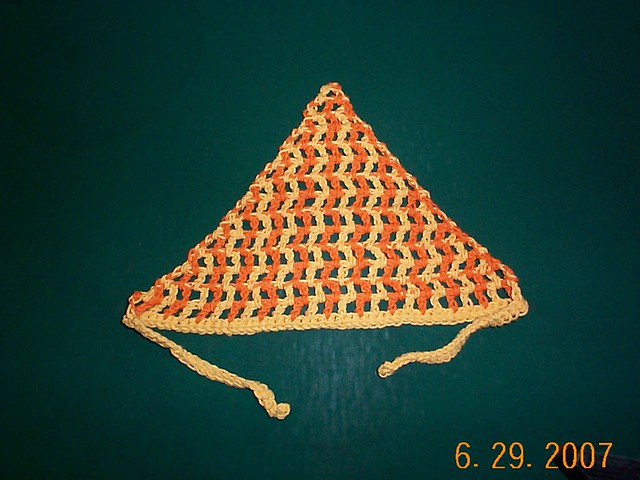
Saturday, March 12, 2011

Crochet kerchief

Crochet kerchief

i have this posted on this blog but it was a while back and the pattern was not written as well.

These work up fast and are easy to make. The open stitches hold your hair back without making your head hot. I wear these nearly every day. The ties are long so if you want you can pull your hair into a pony tail and tie it again around to hold the rest of the hair out of the way.

Hook size: H & I
Yarn: Peaches'n cream
(one ball is not quite enough for 2 full kerchiefs)
stitches:
chain (ch)
double crochet (DC)
single crochet (sc)
slip stitch (SS)

When starting these kerchiefs be sure when SC into the chain row to work into the back ridge leaving the braided edge open and stitch free. This not only makes a neater edge but also makes it easier to work into both sides of your chain.


You can start this 2 ways.

Foundation row: Using a foundation row single crochet and do a foundation row of 73 stitches using the H hoook. switch to the I hook and chain 20, switch back to the H hook and ch1 and SC in each chain. join to the 1st stitch.

Chain start:
Using the I hook chain 73. switch to the H hook and ch1, sc in each ch to the end. Switch back to the I hook, chain 20. switch to the H hook, ch1, sc in 2nd chain from hook and in each open chain. Slip stitch to the 1st chain you made.

If you are making your band a different color than the triangle you can either just do a foundation row of 93 with the H hook and fasten off(do not use the I hook for this method. Or chain 93 stitches with the I hook and SC in each chain with the H and fasten off.

For the rest of the kerchief you will only be using the H hook.

Row 1: ch3, skip next stitch, DC in next stitch (ch1, skip next stitch, DC in next stitch) repeat until you have 26DC and 25 ch1 spaces (do not include the 1st ch3.

Row 2: Turn, ss into 1st chain 1 space, chain 3, DC in next ch1 space (ch1, dc in next ch1 space) repeat to the 2nd to last ch1 space. Skip next ch1 space and DC into last DC.

Repeat row 2 and reduce until kerchief has reached it's final point and you cannot work row 2 anymore. break yarn and weave in ends.

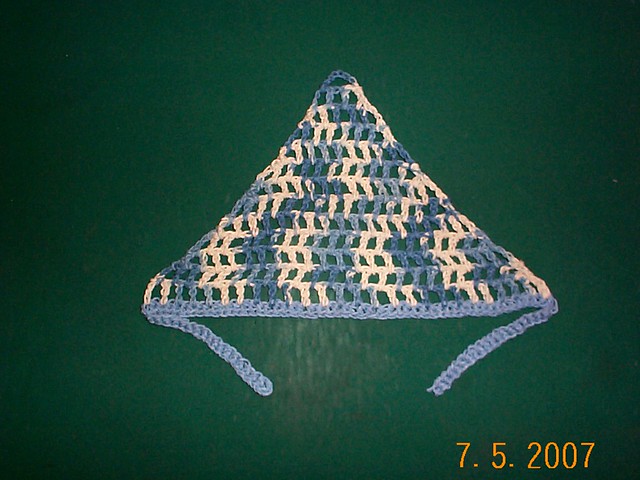
In this 2 color one i worked the band and did the ch3 joined in color B and alternated between colors for each DC made. I changed colors after the DC was completed. so I with color A, DC. than drop color A and with color B I ch 1, DC 1. drop color B. with color A chain 1. continue this to the end. and at the end of the row hold both colors together and chain 3. and than work alternating colors back.

This pattern is available as a PDF file


Friday, March 4, 2011

Crochet dishmat

Crochet dish mat


This is part of my kitchen crochets. These dish mats are perfect for setting on the counter to set your dishes on for air drying. Place them on the counter alone or next to your drying rack. They also make great hot pads for casserole dishes.

This uses a small V stitch which allows air to circulate under dishes yet is stable enough to set glasses on.

Hook: H
yarn: Worsted kitchen cotton (I like Sugar & Creme or Peaches'n creme)

gauge: Gauge is not really important but I get 4" = 7 dc2tog groups and 6 rows

You can make these any size you like but I prefer mine to be about as wide or slightly wider than a hand towel. Make them as long as you need, I like to have mine be the same length as the depth of my counter top.

Chain in multiples of 3. For mine like to have about 78 chains long. you can eyeball this pattern to your personal preference.

Basically all this is is dc2tog (but in the ch 1 spaces) with 2 stitches in each ch1 space, ch1 between each dc2tog. repeated over and over. I break it down in the pattern.

Row 1: dc in 3rd chain from hook, *ch1 yo, insert hook into same ch stitch just worked, yo and draw up loop, yo draw through 2 loops on hook, skip next ch, yo, insert hook through next ch stitch, yo draw up loop, yo draw through 2 loops on hook, yo draw through last 3 loops on hook* repeat from * to * all the way to the end DC in same ch as the last stitch worked.

Row 2: Turn, ch2, dc in next ch1 sp, ch1 * yo, insert hook into same space just worked, yo and draw up loop, yo and draw through 2 loops on hook, yo insert hook into next ch1 space, yo, draw up loop, yo, draw through 2 loops on hook, yo, draw through last 3 loops on hook.* repeat from * to * to the last ch1 space. yo, insert hook into same space just worked, yo, draw up loop, yo and pull through 2 loops on hook, yo, insert hook into ch2 space of turning chain, yo, draw up loop, yo draw through 2 loops on hook, yo and draw through last 3 loops on hook.

Work row 2 until mat is long enough. Cut yarn and weave in ends.

for the trim I work them in a reverse SC.

I recommend attaching the yarn to the right corner of the end if you are left handed and the left hand corner of the end if you are right handed and ch1. work reverse sc (aka crab stitch) around the edge stitch for stitch along the top and bottom. when working along the sides work one stitch into each space and into each row. Work last reverse sc in same space where you joined the yarn. cut yarn and weave in ends.

If you do not want to work the reverse sc you can simply crochet around the edge and over the loop and join as normal.

Reverse SC/crab stitch is my favorite way to put edgings on my kitchenware's. Creates a decorative yet simple and sturdy edging.

To work a reverse SC you insert your hook into stitch behind the one you just worked into, yo and draw up a loop, yo and draw through 2 loops on hook, repeat around. Reverse sc has you working backwards to the direction you normally crochet so for lefty's you will be working right to left and for righties you will be working left to right.

Here are some great video tutorials for reverse single crochet.
Left hand
Right hand

Here is a close up of the one I just made. Sorry I don't have my camera so am using my scanner. Click on the photo for a close up detail of the stitches.


Crochet pot handle cover

Crochet pot handle cover

These pot handle covers are really quick to crochet, take very little yarn and are worked in a continuous round without joining. Gauge is not important but when made and laid to be flat the wine one measures 2 inches across and mine is 5 inches long from top to bottom edge.

Hook size: G
Yarn: Peaches & creme or Sugar n' Cream
stitches: chain, single crochet, reverse single crochet (aka crab stitch)

Start by chaining 2 stitches 4 SC in 2nd chain from hook, 2sc in 1st sc made, 2sc in next sc and repeat until you have 16 sc around. 1sc in next sc until holder is desired length.

final round (this can be at any point). sc in next sc, ch8 (sc in next sc) 8 times. cut yarn and weave in ends. This is the loop you will use to hang it up. you don't have to have a loop if you don't want one.

for the trim I work them in a reverse SC.

Attach yarn at some point opposite the loop and ch1. work reverse sc (aka crab stitch) around the edge stitch for stitch up to the loop do a reverse sc into the last stitch. Starting on the opposite side of the loop as where you did your last reverse sc work 14 regular SC around the loop covering it, chain 1 and continue your reverse sc stitch starting in the next sc on the other side of the loop and work around to where you joined at your start. cut yarn and weave in ends. I like to work my very last reverse sc into the same stitch I joined my yarn into. You have to cross over the loop this way to be able to transition from reverse SC to regular SC. you can see in the 1st image how it crosses.

If you do not want to work the reverse sc you can simply crochet around the edge and over the loop and join as normal.

Reverse SC/crab stitch is my favorite way to put edgings on my kitchenware's. Creates a decorative yet simple and sturdy edging.

To work a reverse SC you insert your hook into stitch behind the one you just worked into, yo and draw up a loop, yo and draw through 2 loops on hook, repeat around. Reverse sc has you working backwards to the direction you normally crochet so for lefty's you will be working right to left and for righties you will be working left to right.


Here are some great video tutorials for reverse single crochet.

Left hand
Right hand