Showing posts with label blocking. Show all posts

Friday, March 15, 2013

Steam blocking

I made a video of me blocking my recent shawl to show how easy steam blocking is. This shawl is crochet from KP Gloss Lace yarn which is a 70/30 blend of wool/silk Steam blocking is my preferred method for blocking. It's really fast and you eliminate that pulled look that you can get from over stretching on pins. For items that have rounded curves, this is a great way to block and not loose those lovely lines.


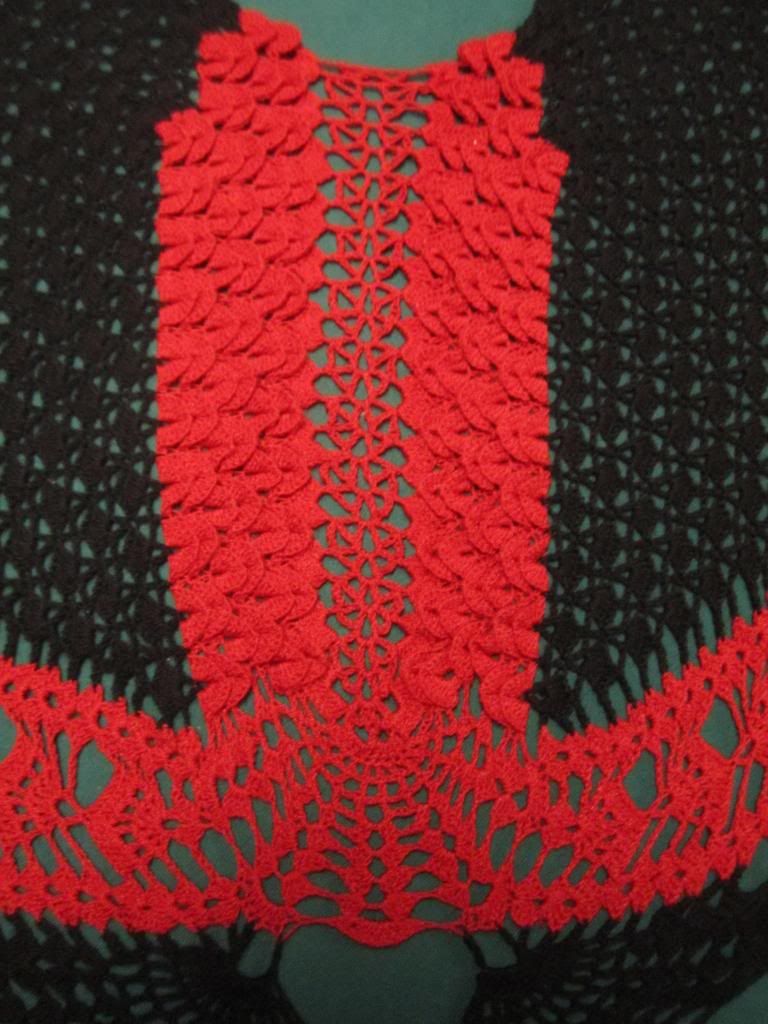
Here is the center crock stitch spine before I blocked it.
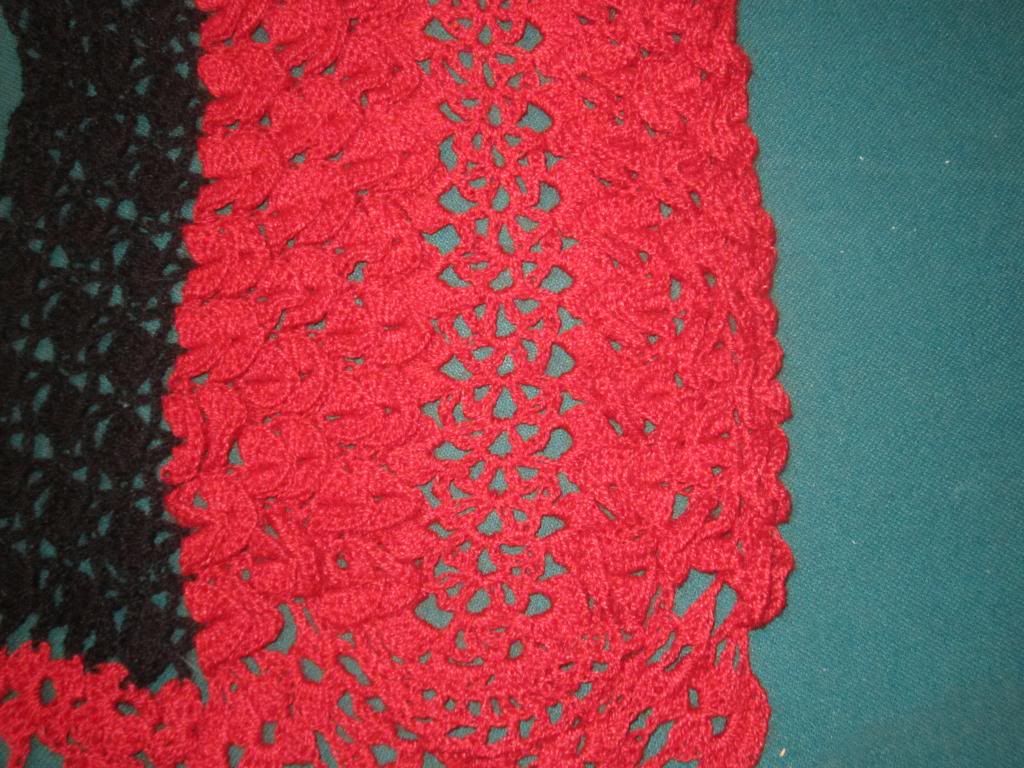


And this shows the difference after blocking. In the video you can see it just lay down as i block it.
Sunday, April 3, 2011

Queen Anne's Lace - FINISHED!

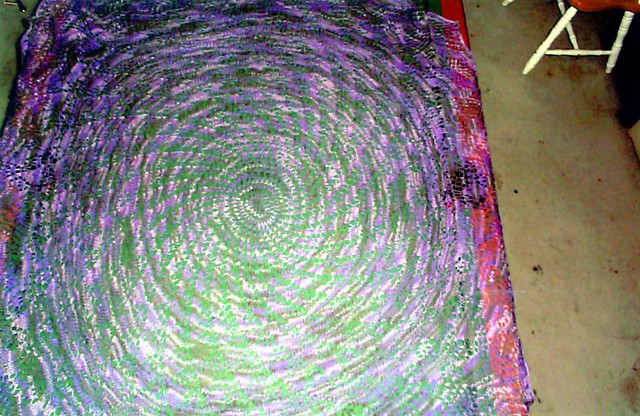
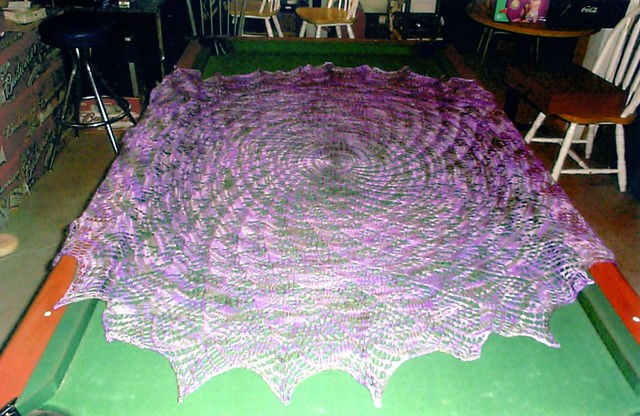
Finally finished my QAL! I cast on last June so it's been a long time coming. It's really big but I like it and will be keeping this one for my self. IT was an easy pattern (IMO) as it's done in the round so everything is knit and it's composed of 32 sections so the rows you work are extremely short even twards the end, you just repeat them over and over all the way around.

If anyone does decide to give this one a go. Early on in the pattern there are rows that are all knit. He leaves these rows unmarked and just skips them but it's not in regular intervals so can trip you up if you are not paying attention to what row # you are on. It is both charted and written. I followed the written pattern

Here are the pattern page links.

Ravelry pattern page

Pattern off rav

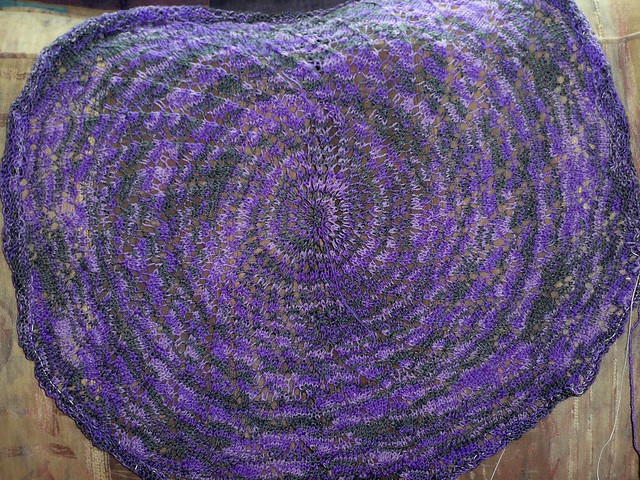
I didn't get a good before blocking phto as I was so excited to see it done. Here is one mid way through the project though. This is a really good depiction of the color. This is the same yarn I used for my wrist warmers and my last Gail.

Friday, June 11, 2010

Purple Gail

I finished another Gail. I love the color purple and saw this yarn. it's serentiy sock yarn and is a self striping yarn. The color changes are really short as it's designed to have really narrow stripes. I was a bit concerned due to the nature of the color changes as they are really sharp and do not blend but my love of purple made me go forward and I'm glad I did! I love the way the gray plays with the purple!

This yarn is so soft! it's a blend of 50% wool, 25% nylon and 25% bamboo.

I'm now using the left over yarn for a pattern called Queen Anne's Lace (PDF file). Which is coming along quite nicely and is a easy knit.

And of course, you can click on any image for a super sized, detailed, photo.


this is before blocking

Sunday, April 18, 2010

Knitting Gail

So I knitted up Gail (AKA Nightsongs) and I love the pattern! It did take a bit to figure out and I had to make a couple minor mental changes to the pattern to make it work for me. Not really changes to the pattern it self but things to make it "click". You can get the pattern free on Ravelry but I don't think it's available off the Rav site (though Ravelry is free to join).

For starters the pattern has a left and right side chart. You don't need both these charts as the shawl is symmetrical and one chart works for both sides. And as for the double YO's at the peak, I purled into them so as to twist each stitch. this worked much better than knitting and purling, makes a cleaner, more consistent stitch.

Then the pattern says to repeat it 7 times. I had one skein of yarn so did 6 repeats as one is not quite enough to get 7.

It says to repeat the chart. But you will make the full chart on the 1st repeat and then after that you will only need to repeat rows 23-37. I made a line to mark this on my chart. This is a small clip of how I drew my lines for the repeats. I repeat the center part as many times as needed and when headed twards the peak or end I then followed the chart to the edge (ignoring the stitches in the yellow poriton). This is my marked on chart but you can transpose the lines to your chart.


The pattern says to repeat and end on row 33. I ended on row 35. On the last 2 pattern rows you need to do the peak slightly different. On row 33 make 1 YO instead of 2. and at the peak on row 35 I did yo, k1, yo. this will set you up to easily make the border.

Because by knitting up to row 35 you will need to start the border chart on row 5.

Here is a photo before blocking. You can click on them for super sized images.


And after blocking. I, again, used my steamer and blocking this way was really fast, I was able to unpin it as soon as I was done steaming it.

Friday, January 29, 2010

steam blocking acrylic

1st, here is an excellent blog post about blocking acrylic.

You can block acrylic

And here is my post.

I figured I would do a more detailed post on blocking the acrylic scarves I have been making. I did another Branching Out using Caron Simply Soft in the Autumn Red color. I really like Caron SS for these as it's a lighter weight and so soft and has good drape. Fancier lace yarns and wool are also great for lacy items but you are not limited to them. They can be quite pricey and higher maintenance. And if I am to gift something to someone i want it to be easy for them to care for. I was speaking with my cousin and she agreed that if she were to receive something that took extra care she would be afraid to use it and I don't want PPL to be afraid to wear my stuff! Now I do in tend to do some fancy fiber lace but this works great till then. And let's face it, if you are on a budget acrylics are very appealing!

So here is the scarf on my dining room table straight off the needles. I did tie in my ends but that is it. It's rather scrunched up as these type of things tend to be.
Here's a closer view of the stitch pattern. Hard to see right?

Ahh, and my new toy! It works great! Conair fabric steamer There is not a brush on the head (fine for my uses) and there is not an off switch to keep the steam from flowing freely when not in use but other than that it's great!

I am using a little portable ironing board that I keep stashed next to a shelf. It has a pull out rack on the back which supports the steamer head. I don't iron (avoid it as much as possible) so this is the board I use.

As you work, you will want to stretch the fabric out with your hands. Steam and shape, steam and shape. Do not try to hold it while you are steaming or you may likely get burned!

And here I'm steaming away! Doing small segments at a time so it's easier to handle. don't move on till you are completely satisfied with the shaping of the area you are working on. Notice i'm not using pins? Don't really need them as the stam relaxes the fibers and it's easy to shape them by hand. I'm not actually touching the fiber with the steamer, I'm hovering just above it so as not to squash the yarn.

Here is a good view of a section that has been steamed against the next which has not.


And the finished scarf laying on the same table for sizing refrence. It gew quite a bit!

Closeer view of the stitches.

And as you see the steaming has not affected the drape in any way, infarct I think it made the drape better!

You can do this with a good steam iron as well. just make sure not to touch the iron to the fabric or it will melt it (acrylic is plastic after all).

Happy crafting and don't let your budget get in the way of creating beautiful things!

Friday, January 22, 2010

new scarf, new toy

I just got my Conair steamer from Amazon $30 free shipping. I have been working on the Branching Out scarf pattern. If you are left handed you may find it usefull to swap the k2tog for ssk and such to have the proper leaning of the stitches. I am new and it is just easier for me to read the chart as is rather than try to remember which new stitch I should be using instead of what the chart reads. Also I use sssk instead of the sl-k2tog-psso for the mirror to k3tog. sssk is the exact opposite and gives it a smoother look. For those who don't know, as a left handed knitter (knit from the right needle onto the left) our stitches lean the opposite direction as the same stitches done right handed.

I think I"m going to love the steamer! it has alot of power and pumps out really hot steam. it was like magic watching the fabric relax and the design emerge. For acrylics you gotta use steam to reset the fabric so to say. wet blocking doesn't do much for acrylics as it's basically plastic.


Sunday, January 17, 2010

Cherry leaf scarf

So I finished my 1st lacy knit project. Cherry Leaf Scarf is a free pattern. I used Carron Simply Soft Eco and I steam blocked it ( as it's an acrylic). This was also the 1st time I grafted 2 pieces together And the 1st time I blocked knitting. I guess you can chalk it up to progress! Anyway, the pattern was fast and easy. I made a few mistakes on the1st half but plugged away and used it for a swatch so I could try some things and iron out some kinks and see how it looked doing it different ways. Then I started on the "real" thing when I felt good enough to do so.


my grafting, pretty good for a 1st try IMO.


Sunday, December 6, 2009

Creating an angle

I have been making another pineapple lace angle. The pattern can be purchased at Crochet Memories. The pattern is very well written (as all of her patterns are). My only suggestion is instead of trying to crochet into the chain stitch just crochet into the space, it's easier.

You can click on any image to get a large detailed view.

So here are the stages. 1st 2 photos of the pieces simply off the hook and having nothing done to them.


this is my drying station if you will. I cut a paperboard cone and taped it on top of my large Pyrex bowl. Then wrapped another cardboard box with a plastic bag (turned inside out) for the flat pieces. The 1st time I did this I didn't pay any attention to which side of the bag was out. The ink didn't bleed onto the project buy why take any chances.
I am short on pins so I soaked the wings in Elmer's glue all - all purpose glue (slightly diluted with water) and pinned the wings. I took my blow dryer and held it on the wings so it would dry faster and I could use the pins for the halo.

Here is the angle body drying. There is a white pipe cleaner thorugh the arms for shaping and to help hold the trimmings when she is done.


12-7

She is finished! I used the glue nearly full strength so she is very hard! But this is going to someone else so she has to be more durable. The rose is just slipped into the "hands" and tied with ribbon. The ribbon is tied and not glued. I figure this will allow the owner to change the look if they desire to. Or replace the rose/ribbons if they fade.

Wednesday, September 2, 2009

Drying the snowflake

These are the photos of my snowflake drying. i had to use a hair dryer to speed it up so I could use the pins for the last flake. The base is drying on some cup tops they used to have at my DH work. They are cone shaped and are for kids cups (he works at a bowling alley) but the top was a bit to skinny (strw hole sized) so I put a dime on top and stretched them over that. for stiffiner I used Elmer's ALL PURPOUS glue very slightly diluted with water.


stiffening thread crochet