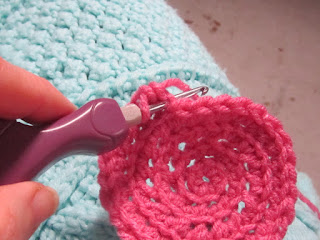
A place where I can share patterns and help others on their way to loving fiber crafts while being left handed.
Sunday, March 25, 2012
Don't hurt your self doing the crafts you love!
Sunday, March 11, 2012
Another day at the gardens!
This is a very photo intensive post. I took many pictures as we walked through the gardens. We are lucky to have such a place as this near us. I do love the art here. I purchased a membership so we can go any time. The boys love the children's garden.
You can click and enlarge all of these photos. I didn't shrink any of them
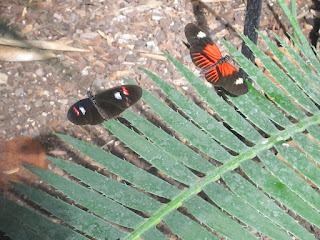
Here are some of the butterflies


This is my personal favoriate, It is outside and you walk by it on the way to the gardens. It is done in a way that no matter which direction you look at it, there are always faces visible.


I believe this one is called History Lesson
 This one you will want to click and take a close look at


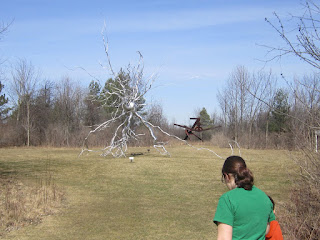
 This one is Nuron
 This one you can see year round from the street
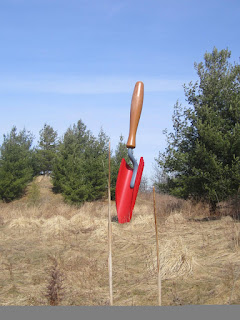
 This is part of their current exhibit
 And these are from the children's garden


Saturday, March 10, 2012
felted crochet slippers


I can't take any credit for these awesome felted slippers but realized it was just taking to long to knit them and figured "why take extra time to make something that is going to be felted down anyway?" so I frogged and did them in single crochet.
Now that being said, I have never felted before so I only made 1 slipper. Seeming how I was not following the pattern (crocheting instead of knitting) and I was "winging it" for size and had nothing to reference it to (never felted before) so I couldn't even guess if it would fit. I figured it would be safer to make just 1 slipper, felt it and see if any adjustments needed to be made. But it turned out to be a perfect fit. These are defiantly mens sized though, I have a rather wide foot and I actually wear an 11 in mens. I ran them through the wash on hot/cold 2x to felt them down.
I wanted to try these because my uncles are coming in and I thought it would be fun to make them felted slippers but send them home w/the slippers not felted so they can shrink them to fit. All my family is really crafty so I think it would be neat for them to do. And I had one uncle a long time ago ask if I knew how to make slippers that didn't wear though because he loved home made slippers but wore holes in the bottoms to easily.
When I was knitting them per the pattern instructions, I was making the mens size. So when I started to crochet them, I compared my square sizes and I made sure my square was the same size as it was when I was knitting them.
Yarn: fisherman's wool
Hook: I (5.5mm)
My mens size squares are 18 stitches wide (single crochet) and 20 rows each
I'm thinking that for womens size I will likely make them 15-16 stitches wide and 17-18 rows per square.
I followed the same construction directions as in the original knitted pattern crocheting it in one long strip and than crocheting the 2 "flaps" onto the strip. Also I found the construction a tad confusing so I made little tags and tacked them to the edges that needed to be sewn together to help keep things straight. At 1st I didn't do this and I sewed the A seams together and realized that it would going to be confusing to try to match up edges so I made the tags. When I seamed them I did so rather loosely. The seam yarn is at the same tension as the rest of the yarn, I figured this was a good idea and it turns out I can't even feel the seams ♥
To better understand the construction and square placement, I printed out the diagram after filling each square with a different color and cut it out and taped it together per the pattern instructions.
Oh, I didn't like how shaggy the outside of the slippers looked after felting so I took our electric hair clippers to them and shaved all the fuzzy off the out side.
Now I just have to make the other one... and many more♥


I finished the slippers! Here are some various shots of them in diffrent stages.
I did find that I liked the fit much better if I sewed the cuffs together in the front for about 5 stitches. it just feels snugger. I'll probably go back to the 1st slipper and stitch it closed in the front just a bit.
this is what it looks like before I seamed it
 Here's a good size comparison, the 1st slipper is laying on top the new one before I felted it. You can see how much it shrank!
 And this is before I took the clippers to it. This is how it looks straight form the wash. Incredibly shaggy! I only shaved down the outside of the slipper and the underside of the cuff flaps. I left the inside and the folded down portion of the flaps shaggy.
3-25-2012
Another slipper update.
I have made another pair of these slippers. I gave them to my step mom and would concider them a childs/large childs size as she has rather small feet and can actually wear boys shoes.
But with these slippers I modified the heels. As the pattern is, it is composed of full squares. but when you seam them together like that the heel ends up with a pointed flap sticking out the back. I simply cropped the corners off the squares that will be seamed together for the heel.
On these slippers each square is 14 stitches x 16 rows.
What I did was on the 2nd square of the strip which would be the heel, I crochet 8 rows at 14 stitches wide. than I reduced 1 stitch per row untill I reached my row height of 16 rows. I attached the next color and worked one row, stitch for stitch. And than I increased 1 stitch each row until I had worked back up to my stitch count of 14 stitches and finished the square to a height of 16 rows.
This does not result in any new seaming directions. I seam them from the toe up as the diagram states. I seam up to one cuff and than start at the broken heel and seam that and work around to the other cuff. This just makes a more rounded heel and eliminates the heel flap.
Here are some photos of how the modified heel is worked.

This is just about finished. I like to have the dark end be the cuffs so that is where I put my modified heel.


And here is a close up of it seamed together. I just think this looks neater.
 I do not have a finished, felted photo of these as they were gifted for the wearer to felt.
Friday, March 9, 2012
Crafting left handed is not a crime
Recently it has been brought to the attention of a left handed knitters/crocheters group that the Craft Yarn Council is implying that left handed people should knit right handed Scroll down to the section labeled "left handed crocheters and knitters". Now the CYC is a great resource for crafters and I often use their downloads as reference pages.
I sent them a reply. Of course I have received no answer but it's the thought that counts, right?
This is the message I sent them.
I just followed a link to your 911 page from a group for left handed knitters and crocheters (of which I am both). We have used and refereed others to this site quite a few times and we are quite saddened to find that you are helping to feed a belief that for some reason left handed knitting and crocheting should be avoided because it is hard. It is not hard. However many people have abandoned either craft due to a frustration that they have been told that they need to do it right handed and in their efforts to do the crafts right handed found it to hard to do and gave up all together. We don’t want people to give up, we want them to love their craft and to do it in the way that is most comfortable and enjoyable for them!
There is a huge misconception that left handed crafters cannot follow patterns and will have a hard time with all patterns. Yes, there are a few slight things that we change but in general we follow patterns as written without any problems at all.
Also you comment that left handed knitters often find it easier to learn continental style. It would seem as though the yarn council, of all places, would know that continental is a style of knitting that can be done either left or right handed. I knit left handed continental (holding my yarn in my right hand, working my stitches onto my left needle) and it is quite flustering when I have people argue with me that it is not continental because they read things like this and take them for truth when infact they are not.
I am self taught in both knitting and crochet. I have also helped many knitters and crocheters with their projects and teaching them how to knit or crochet. Just because I am left handed does not mean I teach a right handed person how to knit/crochet left handed. I teach them and help them in the style they use. We left handed crafters would appreciate the same respect from right handed crafters. We try to spread the view that left handed crafting, though maybe not as common, is not inferior to right handed and there is no reason not to do it if the person finds it easier to do.
Now this really bothers me when I hear people throwing this information out there. I try to promote the idea that we should all pursue our love for yarn in the way that is most comfortable for the individual. I have NOTHING against anyone who is left handed and knits or crochets right handed, everyone needs to discover their own style and as long as you are doing what you love and you are happy with the end result than that's what counts.
But what works for one doesn't work for everyone. With this blog I try to create another safe place for people who knit and crochet left handed to come to if they wan't direction. Of course my patterns are just as easy to follow for right handed people as it is for left handed people. So we lefty crafters have no harder a time following a "right handed" pattern than any right handed person does who follows my patterns.
So in a world of grown adults why does everyone think, of their own conclusion, that it must be hard for me to do what I do. And if I try to say it's not hard, they argue with me that just because it works for me doesn't mean I should teach others to knit the way I do. Yes, I have had this happen to me, I have been told I should not teach people to knit the way I do as though there is something wrong with the way I knit. I've actually been told "Well, that's fine for you, but she needs to know it will be harder to follow patterns if she chooses to knit your way"
This really bothers me. I love knitting, and I love helping people with their projects. I can also help right handed knitters just as well. I can knit left and right handed in both throwing and continental styles. Sure it's extremely awkward for me to knit right handed but if I'm showing someone how to do something and they are right handed it doesn't help them much to show them how to do it left handed.
I've had people ask my why I knit left handed. And honestly, I am left handed so it never crossed my mind to learn right handed because I'm not right handed. People say that knitting is a "2 handed sport" and you use both hands equally. Yes, both hands hold a needle but one hand, your dominate hand, is the one that has to do the more precision work of going into the stitches and knitting multiple stitches together which I find very difficult to do with my right hand because it just doesn't have the coordination to do such fine tasks.
So lets all just enjoy the crafts we love and not discourage people from doing things in a way that is most comfortable for them. I hate to hear of people who gave up on knitting and crocheting entirely because they were taught by someone who insisted that they learn right handed because it's "easier". And likewise let's try not to imply that how a left handed person knits is inferior and should not be promoted. I'm not some sort of freak and there is nothing wrong with me.
Wednesday, March 7, 2012
Classic 10 point hot pad
Also, remember that I am left handed and I crochet from left to right. The downloadable pattern is not hand bias so there should be no confusion for anyone desiring to follow the written pattern. But if you are right handed, these tutorial images will look backwards to you, just reverse what you see here to work the pattern right handed if using the photos.
This is not intended to be used as a pot holder but rater a decorative hot pad, or trivet if you will, to protect hard surfaces from hot dishes.
And a reminder for those looking at these images; you can click to enlarge any of the images for a better view, the photos are high quality and will show up clear.
 I will take you step by step to help you use the techniques I used to create this hot pad.
I hope you enjoy this pattern!

sc = single crochet
ch = chain
bl = back loop
invisible join = I did a post explaining this technique
sc join = place slip knot on the hook, insert hook into stitch indicated, yo and draw up a loop, yo and draw through both the loop and the slip knot.
Center:
With Color A Chain 2, 6sc in 2nd chain from hook, (do not join) Work 2 sc in each sc around until you have 30 sc. on next round work 1sc in each sc (30 stitches) sc 3 (this just offsets your last stitch). Do not break yarn. (30 stitches on ring)
At this point i have finished my center circle and am about to start my frsc.

*Note: If you really don't want to work the frsc you can skip this tutorial and work as
Round 1: ch20, 1 sc in back loop of next 3 sc on center ring. repeat around to create foundation chain for all 10 points.
Round 2: (working into the chain stitches, NOT the chain space) 1sc in next 10 ch stitches, ch2, 1sc into next 10 ch stitches, sc into next 3 sc. Repeat around. continue one with round 2 of pattern as written
Insert your hook into the space you just worked your last sc on the center ring.
 Yarn over and draw up a loop yarn over again
Yarn over and draw through both loops you have on your hook
 you have completed your 1st frsc! It should look like this.
 For your 2nd frsc you will want to place your hook into the space/v in front and also 1 loop behind in the same stitch.
 Yarn over and draw up a loop. which is what I have just done in this photo.
 Yarn over and draw through 1 loop, yarn over and draw through both loops on hook completing your 2nd frsc. Repeat this untill you have made 10 frsc
 now you need to ch 2 and this will make the turn for the point. You do not need to take your hook out, I only did so it wasn't in the way for taking the photo. Now insert your hook into the base of the last frsc you made (the 10th stitch as shown in this photo) insert your hook thorough the base of the last frsc in same way you have all the other frsc.
Yo and draw up a loop, yo, draw through 1 loop on hook, yo and draw through the 2 loops left on the hook.

Repeat the steps to make the frsc for 10 stitches. When done you will have a total of 20 frsc and a bend where you did the ch2 as shown in this photo. The black lines point to the 1st 10 stitches and the blue lines point to the 2nd 10 stitches.

When you have completed this step, sc into bl of the next 3 sc on the center ring.
 Repeat this step all the way around completing all 10 pints. It will be floppy and look like a jumbled up mess, but don't worry it will come together in the end!
When you have reached the last petal and done your last 3 sc. On the last sc leave 2 loops on your hook and break your yarn leaving a good tail to weave in later. Now join in color B. Complete your last sc that you made with color A by hooking color B and pulling through both loops on the hook.
Round 2-4: With color B sc in each sc around, in ch2 points work (1sc in bl of 1st chain, ch2, work 1sc in bl of 2nd chain). Continue in this pattern until you have completed 3 rounds of color B. break yarn and join in color A on last stitch.
Round 5: Work 1 round same as above in color A. Crochet around until you are 1 stitch away from where you started. Break yarn and pull through your last stitch. Skip next stitch and work invisible join into 1st stitch of color A on this round. Weave in ends.
Now your hot pad is nearly complete! Don't worry if it looks a mess. This is what mine looked like after completing round 5. Border
Take the points and twist them in the same direction (it doesn't matter which direction you twist them so long as they are all twisted the same way) as you work so that the right side of the center is facing you but the wrong side of the points is also facing you.

Round 1: With wrong side of point facing you, start at the chain 2 corner space and count back 8 sc.
With color C, start at the ch 2 space and count back 8 sc, working in both loops join yarn directly with a sc into this stitch. Working through both loops work 1 sc in next 7sc. Sc, ch2sc in corner ch2 space, 1sc in next 8sc. [Twist next point in the same direction and count back 8 single crochet from ch2 space. 1sc in next 8sc, (sc, ch2, sc) in corner ch2 space, 1 sc in next 8sc.] Repeat around until all points are outlined.

 Round 2: Working in the back loops of all stitches (including ch stitches); sc in 1st sc of round, 1sc in next 8sc, sc in ch st, ch2, sc in next ch st, 1sc in next 8sc, sc2tog, [1sc in next 8sc, sc in ch st, ch2, sc in next ch st, 1sc in next 8 sc, sc2tog]. Repeat around working your last sc2tog into your 1st st, break yarn leaving a long tail, pull the tail thorugh your last stitch. Skip next stitch and owrk invisible join inot the next sc. Weave tail down to 1st where you made your 1st sc and use it to secure/sew the points together where you joined in color C on round one and the last stitch on the last point of round 1.
I do not know why this image loaded sideways, but this is is a close up of how I finished the edging and weaved in the tail.
Now there is just one more thing you need to do. When it's finished it will look a bit wonky. This is my hot pad just after I finished.
Now just work your way around it straightening out the points and folds and you are done!


